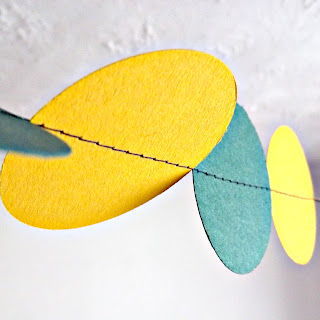
I mentioned before that I had to quickly through a party together for my little boy. I kind of mentioned it to a few people and then got totally distracted by life, and then the day was upon me! I couldn't recall *where* I saw this super-easy paper garland DIY - but it was on some one's blog, so if you know where it's from please do let me know so I can credit the original idea-haver.
I grabbed a whole big pile of scrap card, cardstock I had used a bit of already, cheap card I bought for Ramsey to make collages with, bits of random card that were lying around, and using a 1.5inch circle punch, punched out as many circles as I could. I wanted to string the garlands from the light to the edges of the room, so I used approx. 6 pieces of card for each strand. This gave me around 3 meters of garland.
Sorry for the terrible, grainy photo, I'm having some camera issues and have had to revert to a point and shoot that won't let me change the shutter/aperture settings. So annoying. By the way, if you don't have a circle punch, you could just draw round a cup, use a different shape or a craft knife. It will take longer though!
Next, I set my sewing machine to the longest single straight stitch that I have. I used regular thread and an old, dull needle. Sewing paper is BAD for your bestest sharpest needle.
Starting from the middle of your first circle, sew to the edge and then pop another circle right up to the edge. You want to try and avoid your needle poking in between, so you can slightly overlap them if you like, but usually the card will just sit flush up to the previous circle anyway. Once you get into a rhythm, you'll find you don't need to hold or guide the card, you can use both hands to pop the next circle under. This makes it super quick. Once you have popped in all your circles, you'll find you have a long strand of quite strong garland. Fun! Backstitch over the end as you would with fabric to seal the deal.
I didn't pin my garland to the wall, I just slipped the first circle into my lampshade and it kind of help itself up. Then I hung a few circles over the curtain rails to hold up both ends.
Everyone said how fab they looked! Let me know if you give it a go!
I’ve Never Been Here Before {my book}
5 months ago


3 comments:
oh i just LOVE that idea!! it is sooo cute! hmmm i don't have any parties coming up but christmas will do! how fun!
Thanks for sharing!
xo,
cb
Love this idea. Tempted to make some for my craftroom....
I’ve reading with full of interest. He’s certainly raised my awareness.
Post a Comment